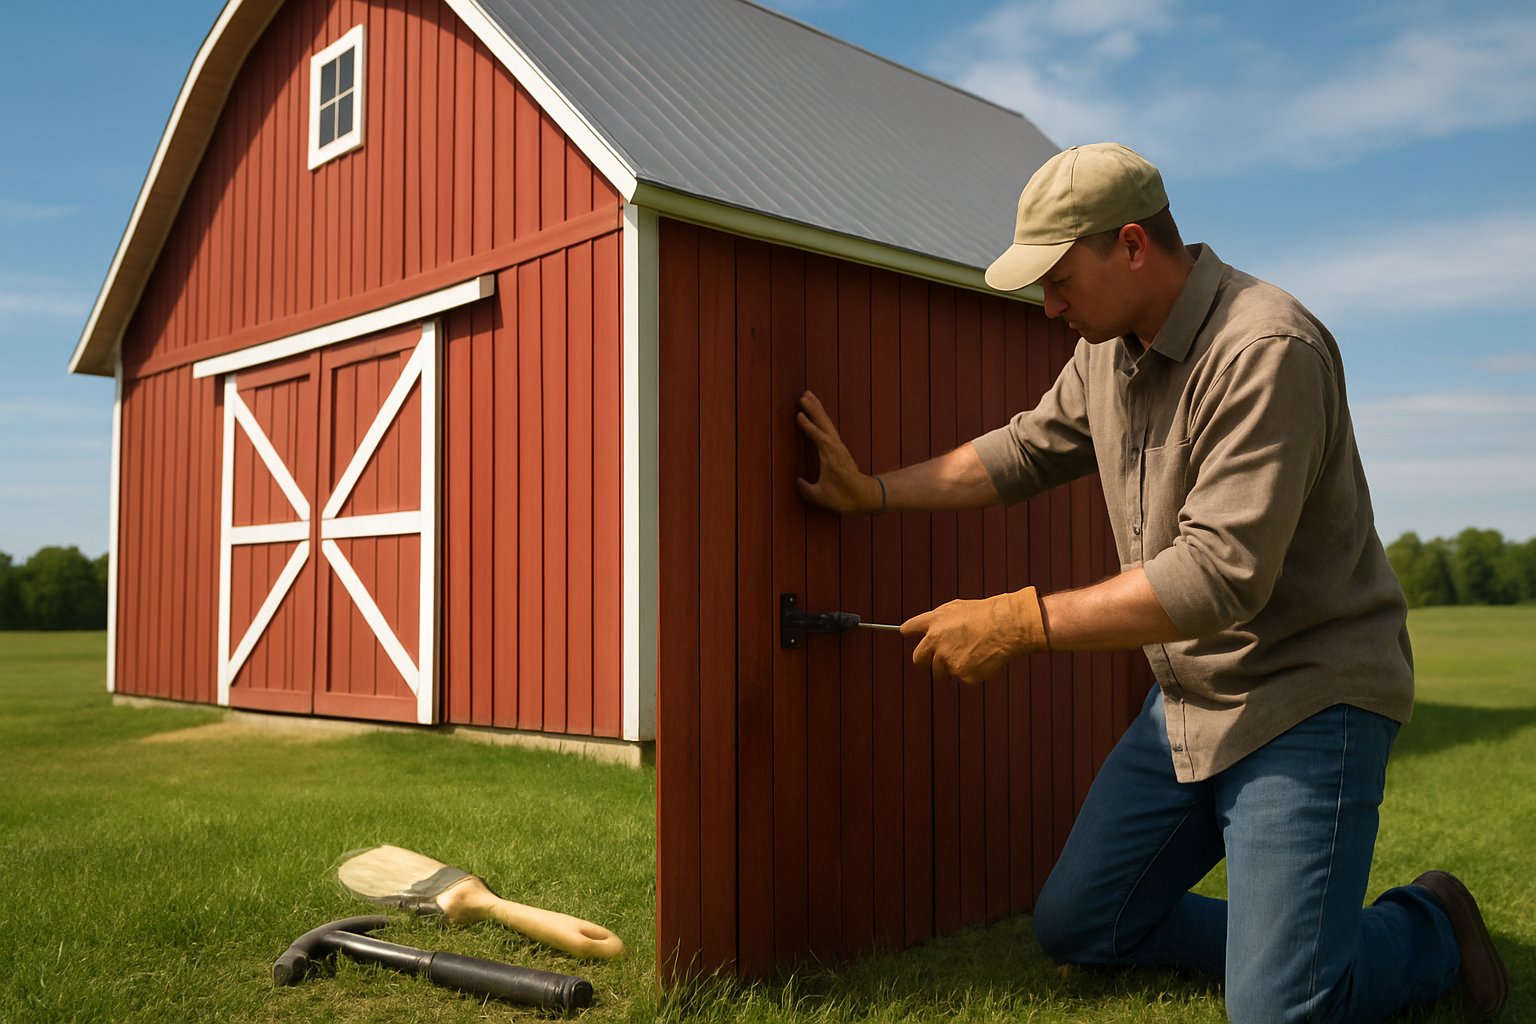
Transform Your Farm Property Before Winter
Old barns everywhere across the outskirts of London and Middlesex County deal with structural headaches that can feel daunting and never ending. Weak support beams, water damage, and pest infestations are common, but you can tackle a lot of these with basic repair methods.
Most barn deterioration follows predictable patterns. Basic barn repair techniques address foundation stability, support, weather protection, and pest prevention.
These repairs go after the main culprits behind barn decay. If you get comfortable with these methods, you can keep your barn standing strong with simple, proactive work.
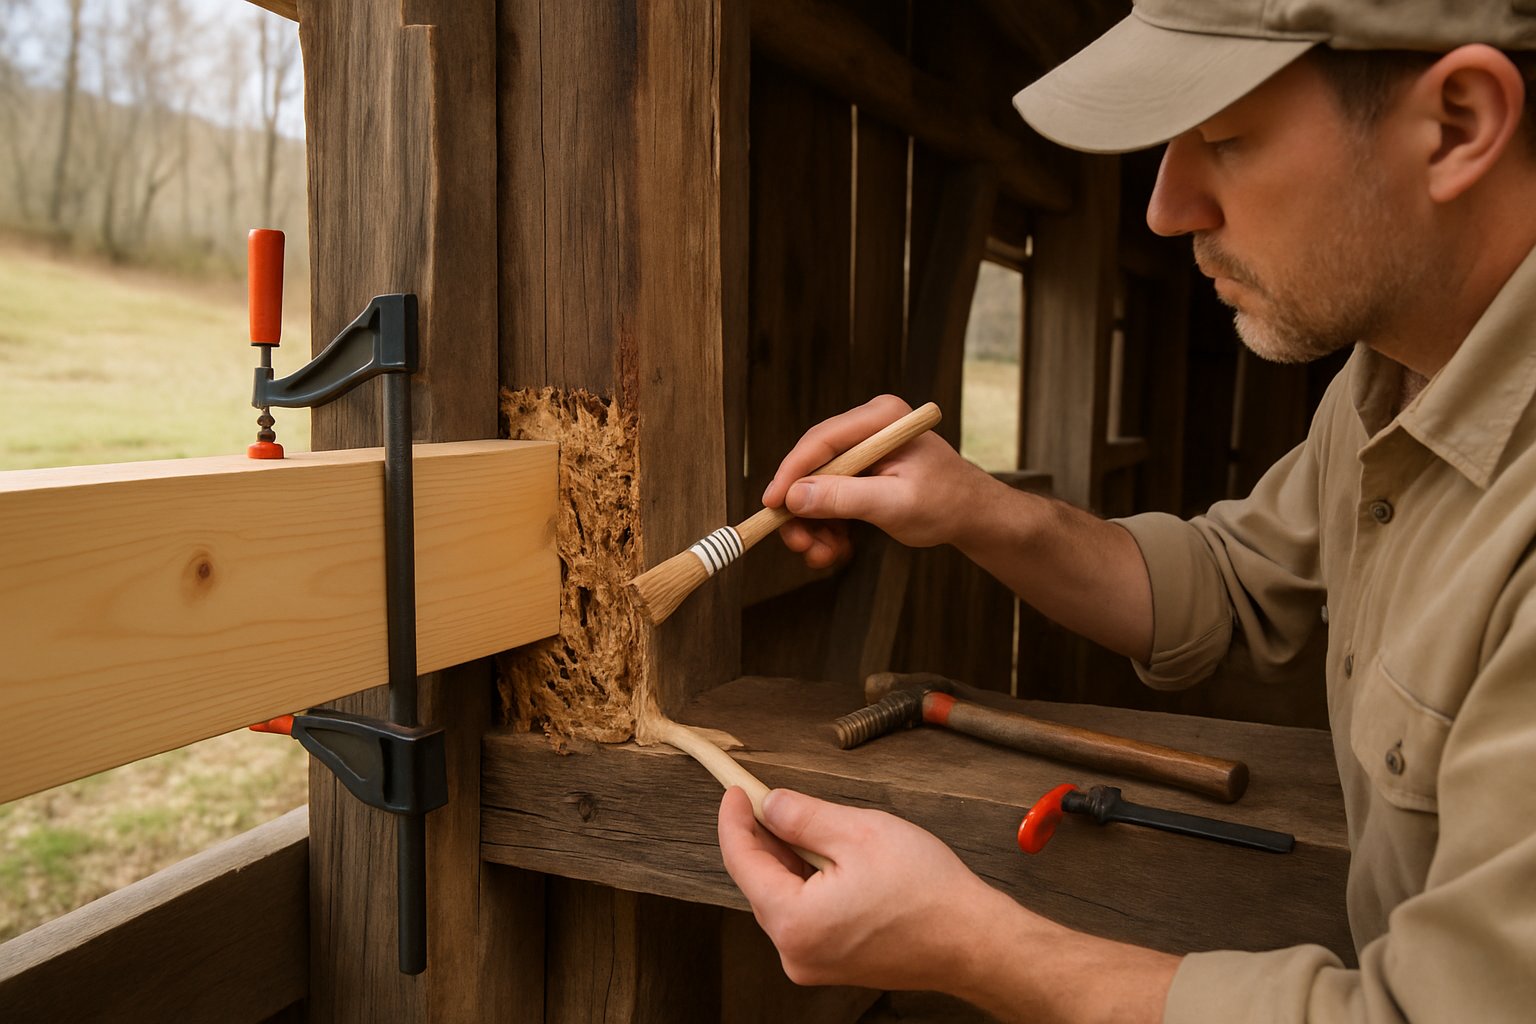
1) Reinforce barn columns with new wood to restore structural integrity
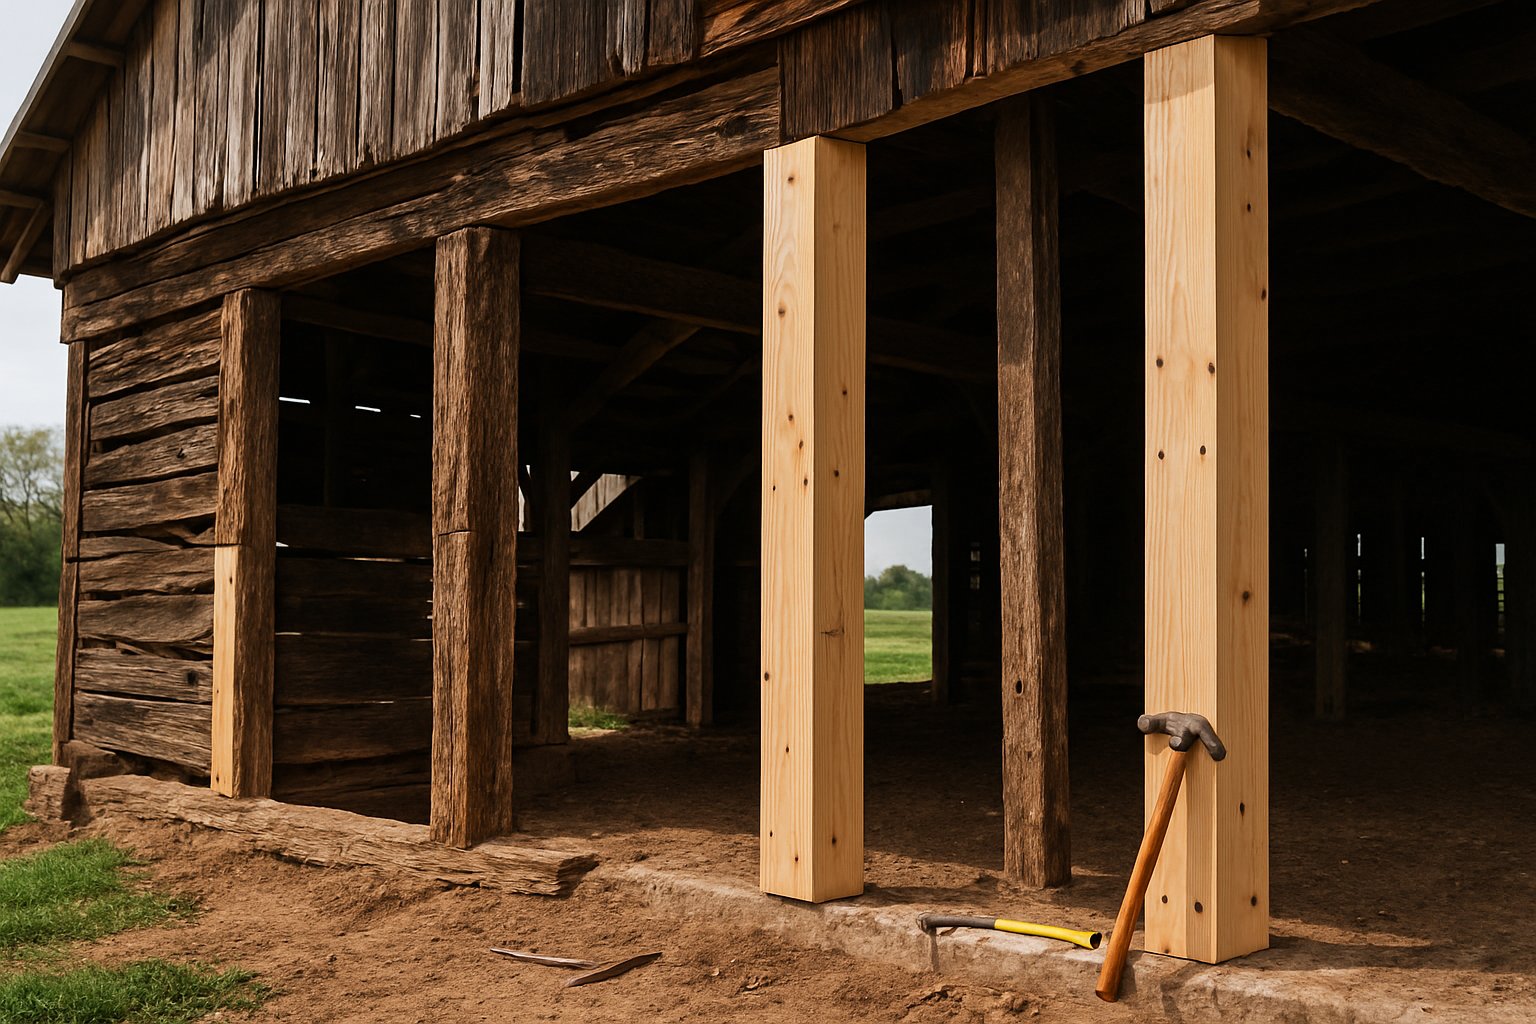
Barn columns hold up the whole structure. If they rot or weaken, the building’s at risk.
Rot usually starts at the base where moisture hangs out. Ground contact just makes things worse, inviting decay and bugs.
Check each column closely. Push on the wood—if it’s soft, crumbly, or discoloured, you’ve got a problem.
Cut out every bit of rot. Don’t leave anything mushy behind or you’ll just see the issue return.
Sister fresh lumber right next to the old column. Go for pressure-treated wood or naturally tough choices like cedar or white oak.
The new wood should be as big as, or bigger than, the original. Bolt or screw it in every foot or so with galvanized fasteners.
If a column’s really far gone, you’ll need temporary supports. Adjustable posts can hold things steady while you work.
Some pros use steel sleeves to beef up columns even more. Those covers help keep moisture out for good.
Extend the reinforced columns below ground and add gravel around the base. That helps with drainage and keeps water from pooling.
Post frame building repairs done this way can actually make the barn stronger than it was to start with.
2) Replace rotted sill timbers to stabilize the barn foundation
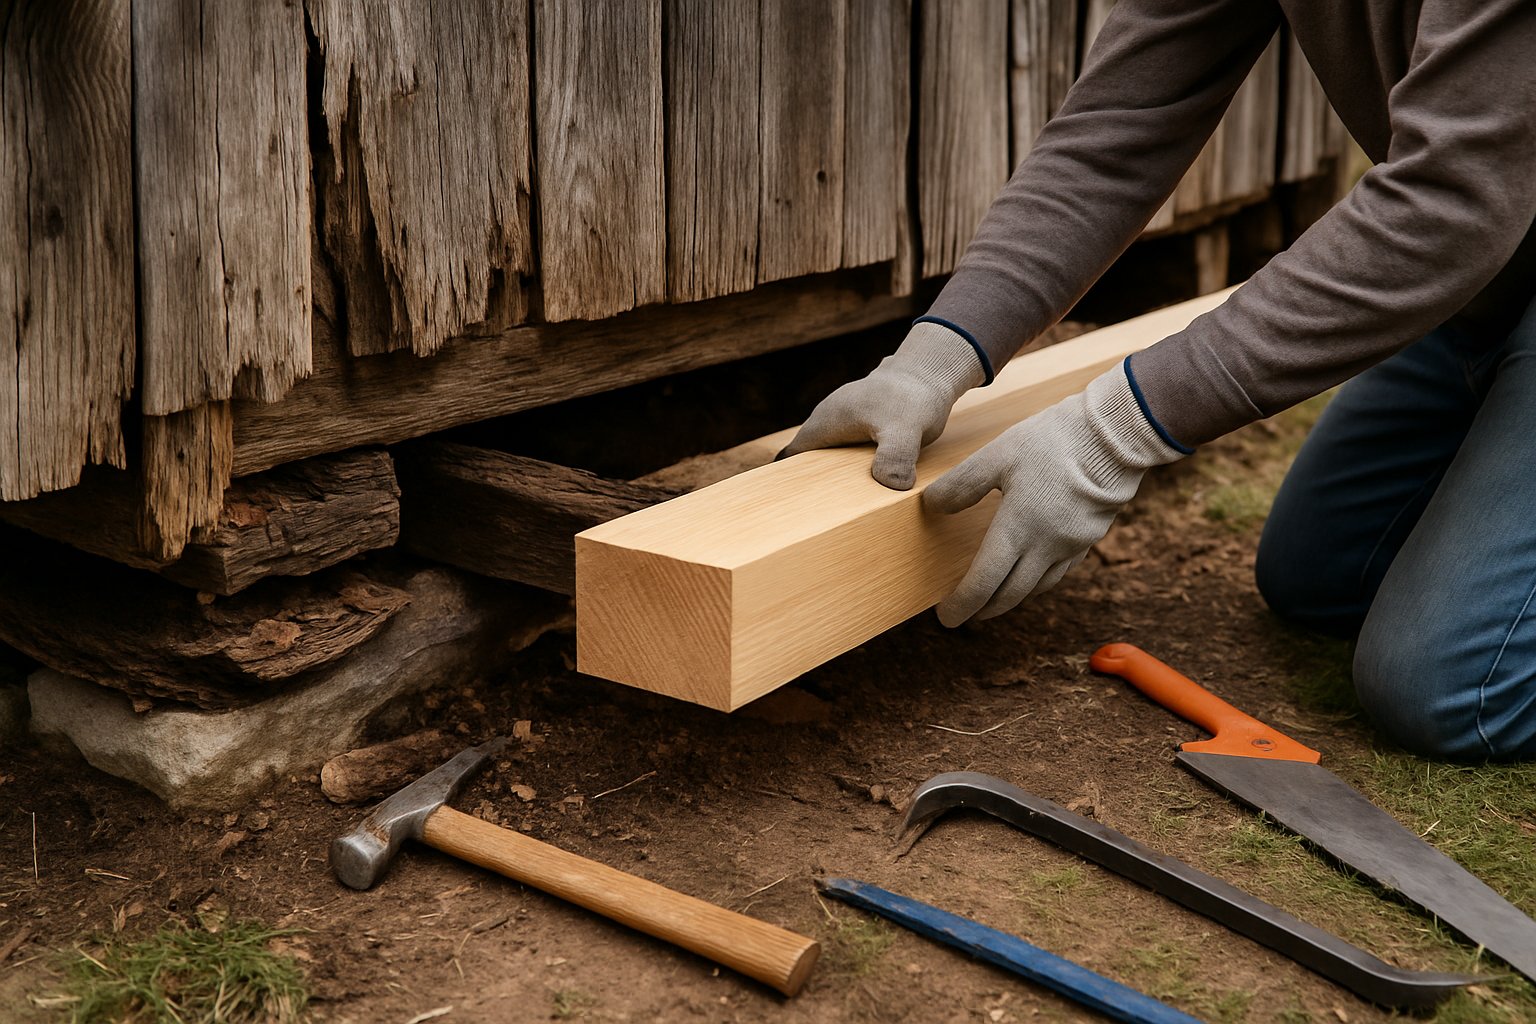
Rotted sill timbers are a big deal. The sill plate sits right on the foundation and holds everything above.
Water and ground moisture eat away at these timbers over time. If you don’t fix it, the barn could eventually collapse.
Jack up the area above the bad sill with hydraulic jacks under solid beams. That takes the weight off while you work.
Cut out only the rotted parts—go back to healthy wood on both sides. Measure and cut new pressure-treated lumber to fit.
Old barns usually use hefty boards for sills, like 4×8 or 6×8 inches. Set the new timber in place, making sure it’s level and lines up with the existing sill.
Sandwich damaged beams with new wood if the rot reaches into floor joists. Bolt everything together tightly.
Tie the new sill to the old one with metal brackets or timber joints. That way, the support stays continuous.
Lower the jacks slowly and check all your connections. The structure should settle back down evenly.
Replacing sill sections takes some planning, but you can do it with basic tools and patience.
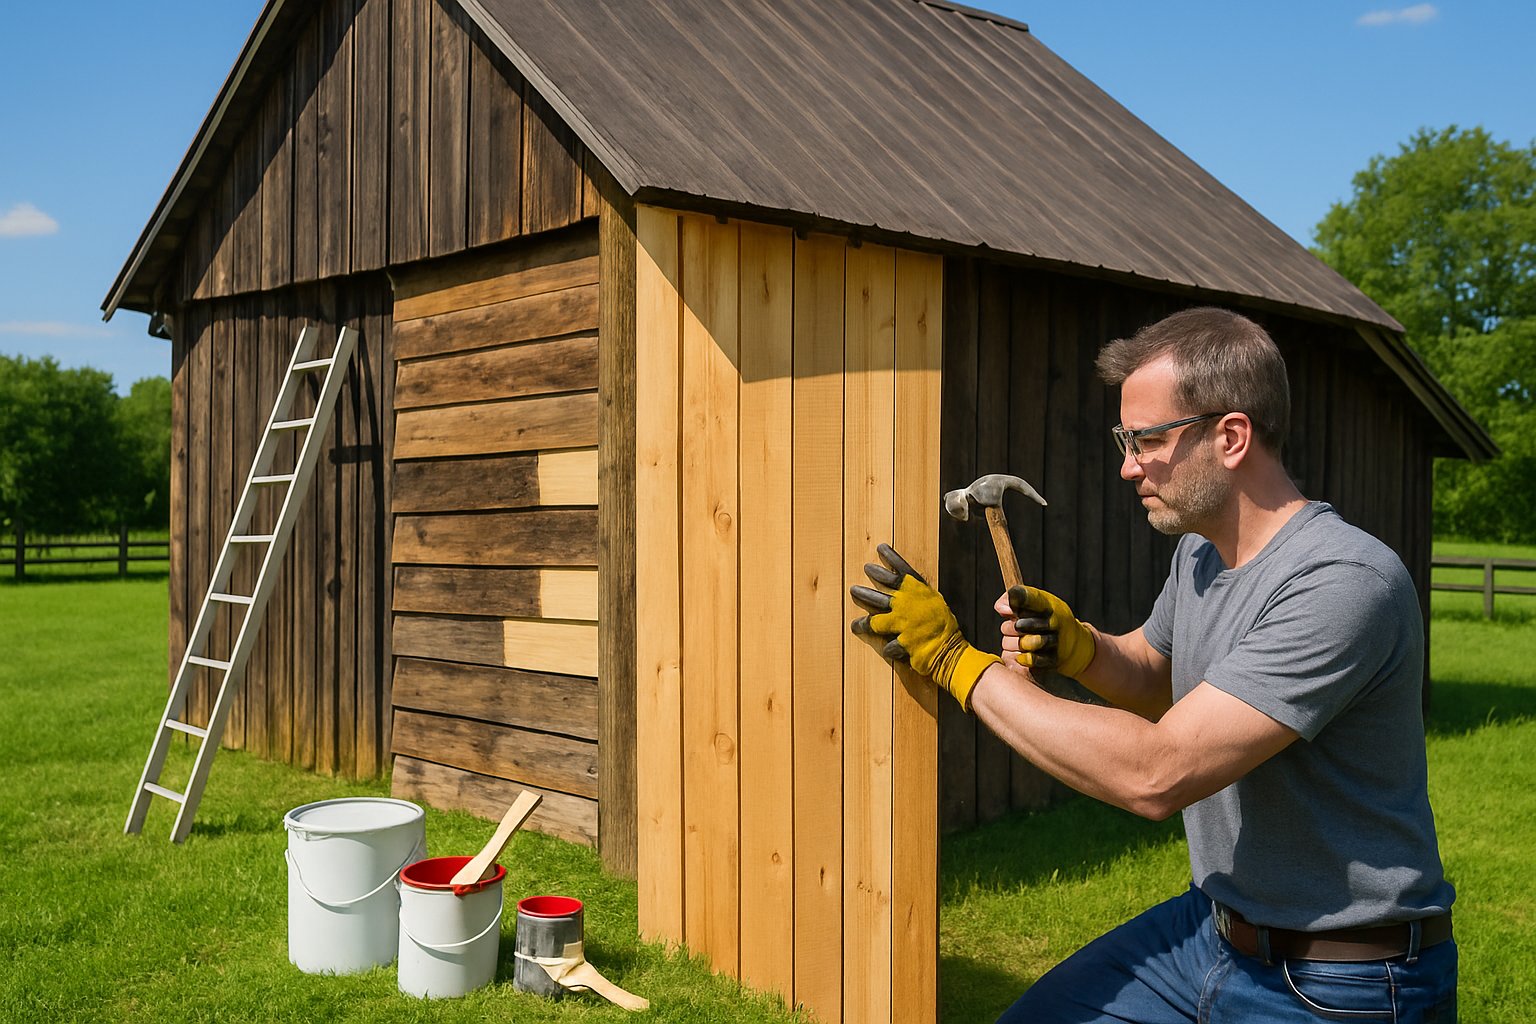
3) Apply weatherproof sealant to protect exterior wood surfaces
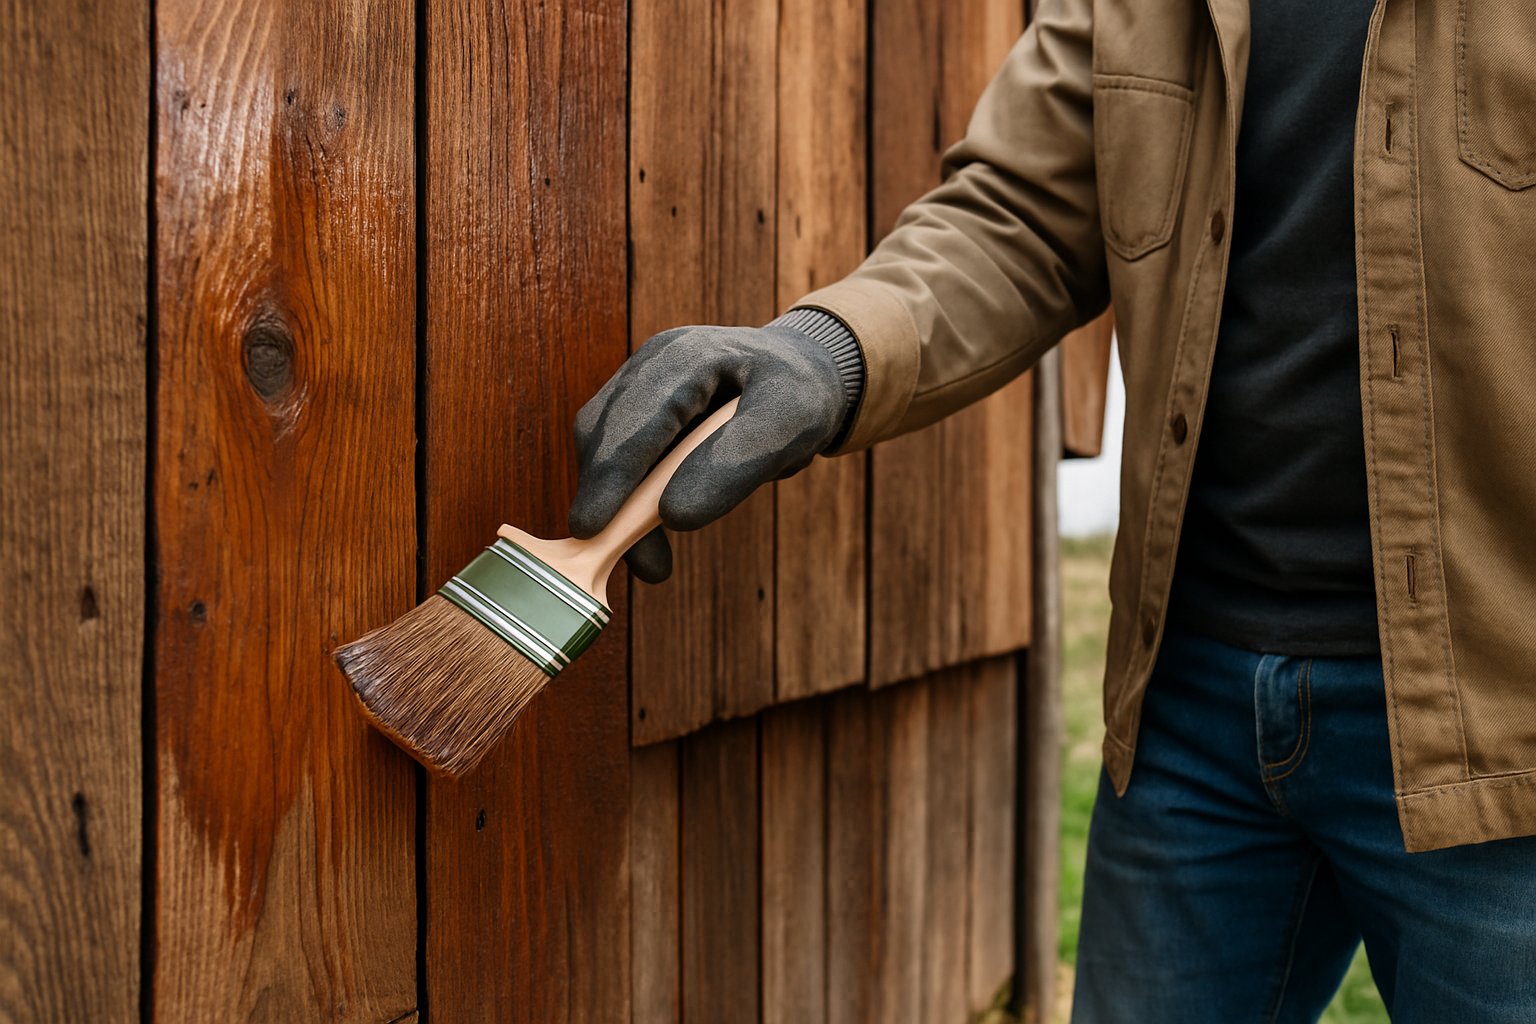
Barn wood gets hammered by rain, snow, and sun. If you skip protection, siding and trim will split, warp, and rot before you know it.
Weatherproof sealant puts up a shield, keeping moisture out but letting the wood breathe. That’s key for avoiding pricey repairs later.
Clean the wood first with a pressure washer or brush. Get rid of dirt, mildew, and any peeling paint. Let it dry for at least a day.
Pick a clear or semi-transparent sealant made for exteriors. Waterproof wood stains soak in deep and are great for barn siding.
Brush, roll, or spray the sealant on when it’s not too hot—avoid direct sun and days above 85°F. Always go with the grain.
Hit spots where water tends to gather extra hard. Door frames, window sills, and corners need thick coats.
Most sealants need two coats. Wait as directed between them—usually a couple hours, depending on humidity.
Proper sealant application adds years to your wood. Plan to reapply every few years.
Check for worn spots each spring and touch up as needed. A little maintenance goes a long way.
More on Waterpfooing:
If waterproofing is you jam, and you have a home that is constantly under threat from water in the basement or other moisture concerns, check out our other article on basement waterproofing here.
4) Repair termite damage using treated lumber and epoxy consolidants
Termites cost Americans billions every year. Barns are especially at risk, being wood structures out in the country.
Before you fix anything, get rid of every last termite. Call a pro or use bait systems—don’t bother patching up wood if the bugs are still around.
Figure out how bad the damage is. Minor stuff looks like little grooves or tunnels. If you see deep holes and crumbly wood, it’s more serious.
For small damage, use liquid wood hardeners to toughen up what’s left. Let it dry, then fill the gaps with wood filler or putty. Sand it smooth when you’re done.
For bigger jobs, go with structural epoxy. Mix it up as directed and work it into the damaged spots. Give it time to cure.
If boards are too far gone, cut them out and swap in new pressure-treated lumber. Sister new joists to damaged ones for extra strength—just bolt them right up against the old wood.
Brush wood preservative on all the repaired spots. Focus on areas where wood touches soil or concrete.
Check the barn every year for new termite signs. Pay close attention to foundations and floor joists.
5) Install metal flashing to prevent water intrusion at roof joints
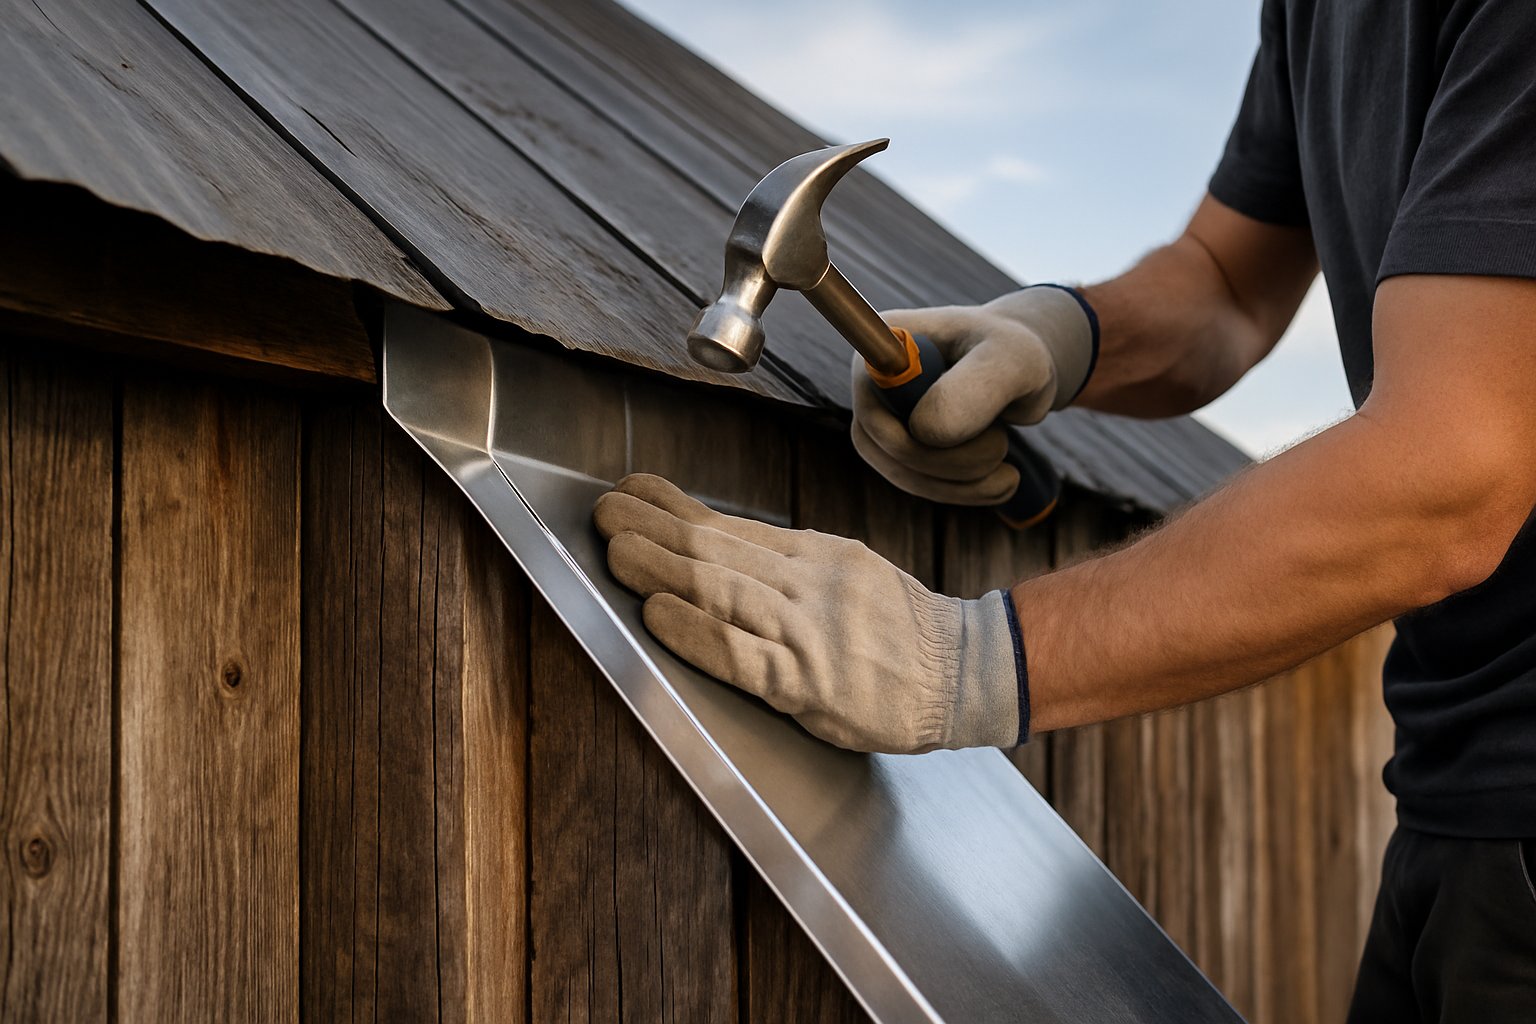
Metal roof flashing keeps water out at the most vulnerable roof spots. It redirects water away from joints, seams, and tricky intersections.
Focus on where the roof meets walls, around chimneys, and at valleys. Water loves to sneak in at these points.
Measure and cut the flashing to fit each section. Overlap pieces by at least two inches. You want gravity to do the work—water should flow over, not behind, the flashing.
Galvanized steel and aluminum are solid choices. They hold up well and don’t rust easily.
If your roof is steep (10/12 pitch or more), use square flashing for a better seal.
Run a bead of roofing sealant along the edges for extra protection. Make sure there are no gaps where water can sneak through.
Check the flashing during routine maintenance. Look for loose spots, cracked sealant, or any rust.
Good flashing keeps your roof and barn structure dry, protecting everything underneath from water damage.
Essential Tools and Materials for Barn Repair
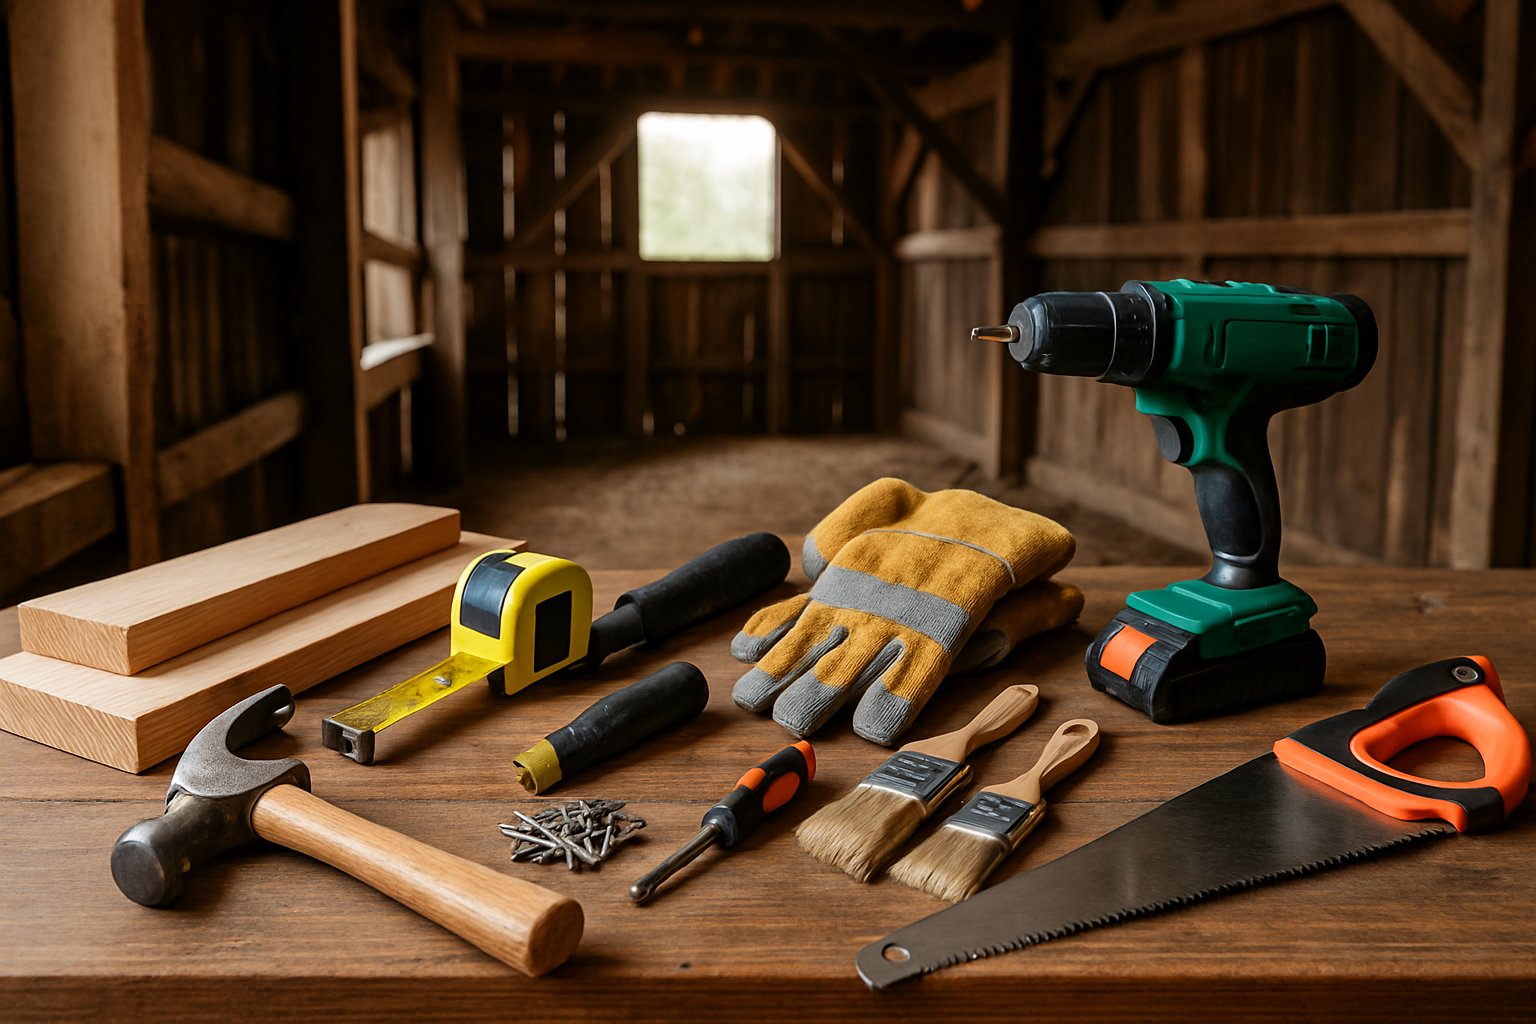
Having the right tools makes barn repairs way smoother. Using quality materials means you won’t be doing the same fixes over and over.
Tool Selection Guidelines
A solid hammer is a barn owner’s best friend. Hammers are fundamental tools—you’ll use one for almost everything. It sounds silly, but it is easy to overlook, lol.
Circular saws cut damaged boards down to size. A drill (with a handful of bits) lets you make pilot holes and drive screws into tough wood.
Pry bars pull out old nails and rotten boards. Use a level to keep everything straight. Measuring tape is a must for getting cuts right.
Don’t skimp on safety gear. Gloves keep your hands safe, and safety glasses protect your eyes from flying debris.
You’ll need a sturdy ladder. Extension ladders reach high walls and roofs, while step ladders work well for lower repairs.
Choosing Quality Repair Materials
Pressure-treated lumber stands up to rot and bugs way better than regular wood. It costs more, but it’s worth it for longevity.
Galvanized nails and screws won’t rust like plain steel. If you want to go all out, stainless steel is even better for damp spots, though it’s pricier.
Metal roofing lasts longer than asphalt shingles on barns. Steel and aluminum handle rough weather and don’t need much upkeep.
Exterior wood stain soaks in deeper than paint and lasts longer. Go for one with UV protection to keep your wood from graying or cracking.
For cracks in concrete or worn floors, use patch compounds. Epoxy-based mixes hold up best in busy areas.
Best Practices for Long-Term Barn Maintenance
Keeping your barn in shape means you’ve got to stay ahead of problems. Regular inspections and a bit of preventive work make a huge difference—catch issues early, and you’ll avoid the big, expensive fixes down the line.
Preventing Structural Issues
Foundation problems can lead to the priciest barn repairs out there. Property owners should check for cracks, settling, or water damage around the base every three months.
If you spot small cracks, seal them up with concrete caulk before they get worse. It’s honestly easier to fix them early than deal with a bigger headache later.
Moisture control keeps wooden parts from rotting. Install good ventilation to stop condensation from weakening support beams.
Gutters and downspouts should send water at least six feet away from the foundation. If water pools near the base, you’re just asking for trouble.
Roof maintenance helps you catch leaks before they wreck the inside. Replace missing or loose shingles right away.
If you have a metal roof, look for rust spots or loose fasteners. Those can let water sneak in and start problems fast.
Steel barn maintenance isn’t quite the same as with wood. Steel resists rot, sure, but it’ll rust if you ignore it.
Fire prevention? That’s a big one. Keep hay and straw away from electrical areas.
Bad wiring causes a lot of barn fires, so get a pro to check your electrical system every couple years.
Routine Inspection Tips
Monthly walkthroughs help catch problems before they get out of hand. Barn owners should look for loose boards, sagging beams, or gaps in the siding each time they check.
Shine a flashlight into those dark corners—sometimes that’s the only way to spot hidden issues. It’s easy to miss things if you don’t.
Spring inspections mostly deal with winter’s aftermath. Ice, snow, and freezing temperatures can mess with foundations or damage the roof.
Always check all the structural connections and hardware for looseness or rust after winter. Even small shifts can cause bigger headaches later.
Summer brings its own set of challenges. Ventilation systems and pest activity need extra attention.
Good airflow keeps moisture from building up, and pest control helps prevent rodents from chewing through stored materials or wires. Nobody wants to deal with that mess.
When fall rolls around, it’s time to clean out the gutters and check heating systems. Leaves and debris can block drainage if you let them pile up.
Test any heating equipment before things get too cold. It’s better to find problems early than when you actually need the heat.
Annual professional inspections can reveal issues owners might overlook. Qualified contractors know what to look for and can suggest repairs before things get expensive.
Keep documentation of repairs, inspections, and improvements. Tracking this stuff helps you notice patterns or recurring problems that might need a closer look.